
How to Use a Pocket Logo Guide + Freebie Guide
Both professional and hobby crafters can greatly benefit from using a guide to line up pocket logo designs perfectly every time. They make it easier to print shirts and greatly improve the time needed to prep. Plus, they add consistency to your product and make sure that your placement is the same no matter how many apparel items you are printing.
To start using a pocket logo guide, download our free guide.
Step 1. Print out the PDF guide & cut
Use 8.5” x 11” paper to print out our free PDF. Following the cutlines on the document, cut out the guide.
Pro tip: Before cutting out the guide, glue the guide to something slightly more solid like thin cardboard so that the guide is more durable.

Pre-cut

Cut
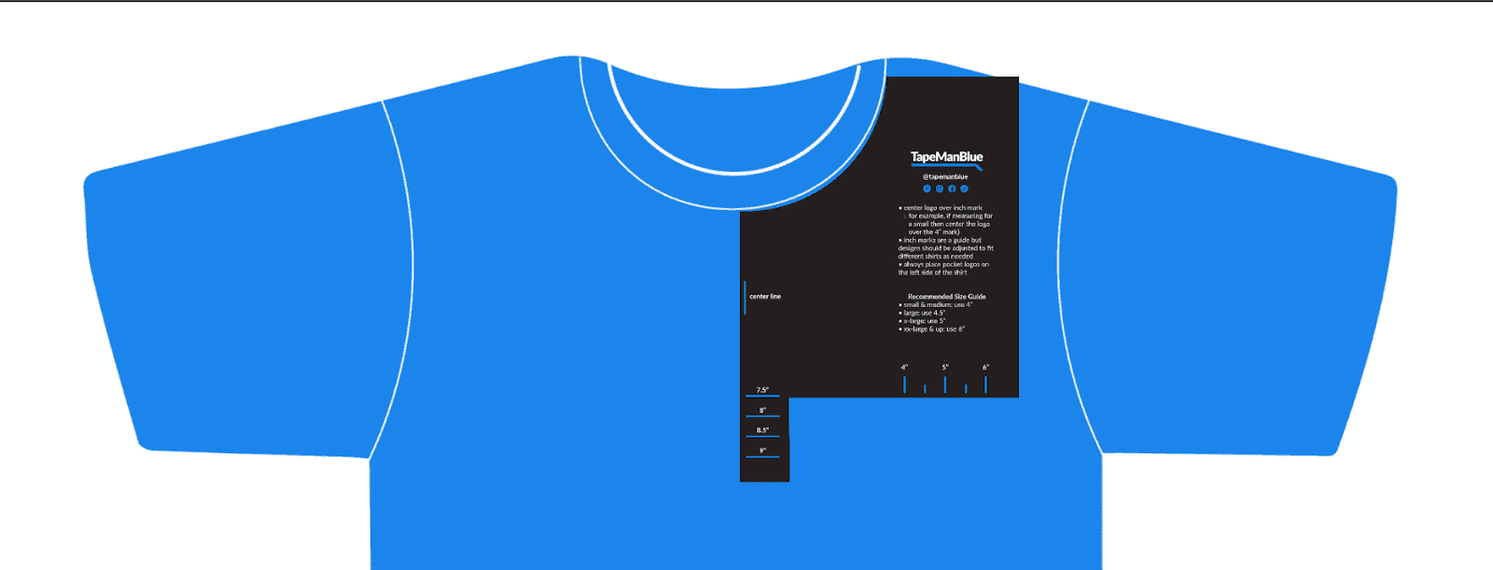
Step 2. Line the guide up with the collar of any shirt
Using the cutout, place the guide at the seam of the collar on the left side of the shirt. The guide should line up with the center of the shirt.

Step 3. Line up your pocket logo
Follow the instructions on the guide to determine what inch mark to use for different sized shirts. Depending on the collar, place the logo between 7.5” and 9” down using the guide.

Step 4. Remove the guide and secure the logo in place
Using the sticky transfer tape, remove the guide and press the transfer tape firmly onto the shirt. Now, your design is ready to press! Reuse the guide for all your apparel with pocket logos.
What are some pro tips for applying heat transfer vinyl?
- Iron your apparel quickly with your iron or heat press before using the guide. Just hold the heat on the item for 5 seconds to provide a nice smooth surface for your vinyl to stick to.
- Apply heat to the item again after removing your transfer tape in order to seal the vinyl into the apparel.
- Use wax paper on top of the transfer tape to prevent the plastic from sticking to your iron or heat press.
- Peel back the transfer tape slowly to make sure no edges from the vinyl lift. If there is any lifting, allow it to cool before trying to peel the tape.
TapeManBlue Transfer Tape Is Perfect for Your Projects
To easily transfer your vinyl projects, purchase transfer tape from TapeManBlue. Our transfer tape is made in the United States from high-quality materials. We offer free shipping on all orders and everyday low prices for your products.
![]()